


How to create Dreamy Effect in gimp for beginners.
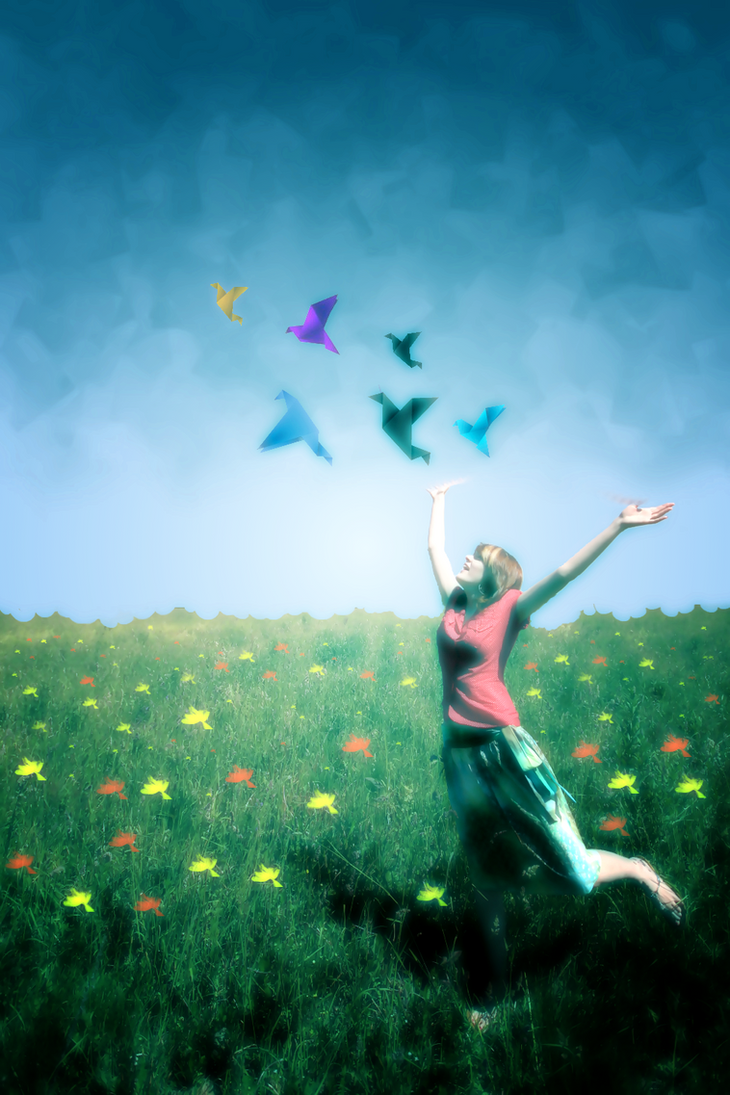
I love fantasy graphics and manipulations..we all do. We live most of our fantasies in our dreams. So today I'll explain you a easy and effective method to produce dreamy effect in your fantasy artwork so that you can represent your fantasy through your art in a more beautiful and fantasizing way. Following are some examples of artworks done with the use of Dreamy Effect.

The method that I going to discuss is quite easy to follow even for the beginners so all type of users can utilize this tutorial.
So let's get started...
Resources:
Any image of you photomanipulation which you want to add effect to. I' using this image for example.
Gimp 2.6 or better.
Step 1: Load the image in Gimp.

Step 2: Go to layer window. Right click on the Background Layer and select Duplicate Layer. This will create an exact copy of the Background Layer. Name this new layer "mono" and place it below the Background Layer.

Step 3: Now first ensure that the "mono" layer is selected and then go to Colors>>Components>>Channel Mixer and open it.

Step 4: Above action will open a setting window for Channel Mixer. In this settings window enter values [RED: 122 Green: 101 Blue:200] as sown in the figure below.

After filling up the values click "OK" .
Step 5: Now time to add one important ingredient for dreamy effect the BLURRRR. haha
To do this go to Filters>> Blur>> Gaussian Blur and open it. In the settings window that will open after the last action fill up values [Horizontal:15 Vertical: 15 ] according to figure below.

Step 6: Now Select the Background Layer and set it's transparency to 60%.

Step 7: Now select the "mono" layer again and go to Colors>>Colorize and open it. Now next step is kind of depend on your interest in color or requirement at the moment. In the colorize settings window you need to set only Hue Slider, leave other sliders as they are. Slide the Hue slider which will provide you a range of different colors as you slide it. Select your preferred value and press ok.

i've chosen the value as shown in the figure above and the result is as shown in the figure below:

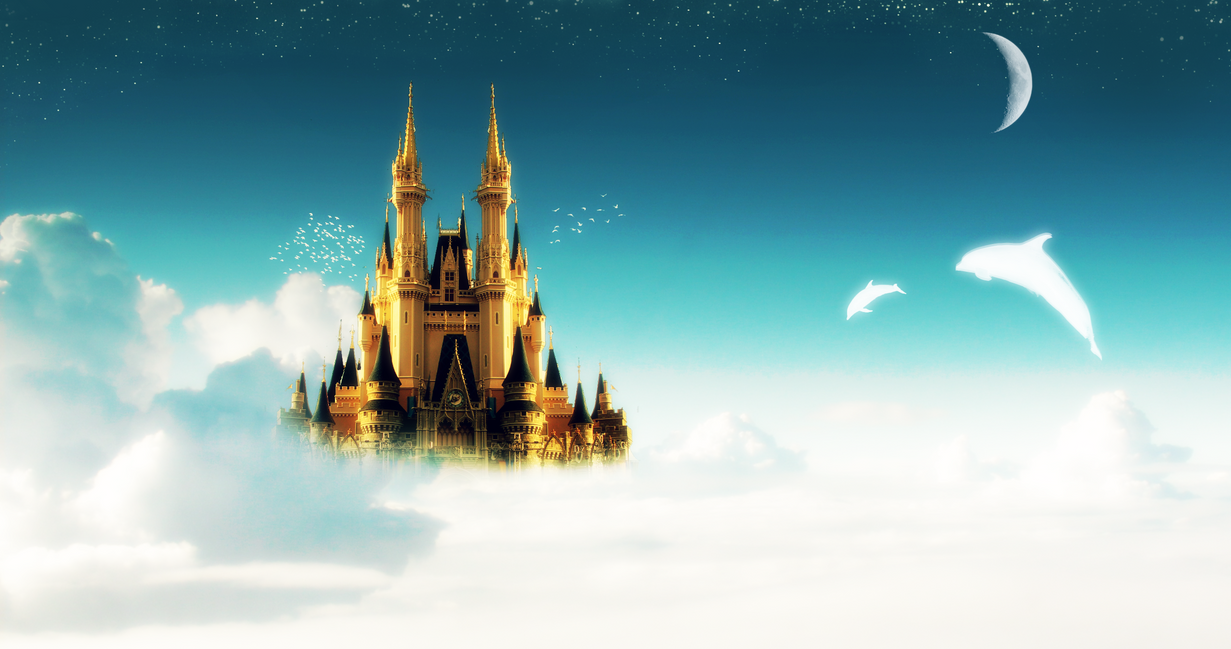
And that's it our dreamy effect is complete, now just save the image. As you'll experiment with the Colorize settings you'll get pretty awesome results. Some of the examples as shown in the figure below:

I hope you'll like it. And it you do than please leave comments and share this tutorial.... Thanks and Enjoy.. [*_*]
The method that I going to discuss is quite easy to follow even for the beginners so all type of users can utilize this tutorial.
So let's get started...
Resources:
Any image of you photomanipulation which you want to add effect to. I' using this image for example.
Gimp 2.6 or better.
Step 1: Load the image in Gimp.
Step 2: Go to layer window. Right click on the Background Layer and select Duplicate Layer. This will create an exact copy of the Background Layer. Name this new layer "mono" and place it below the Background Layer.
Step 3: Now first ensure that the "mono" layer is selected and then go to Colors>>Components>>Channel Mixer and open it.
Step 4: Above action will open a setting window for Channel Mixer. In this settings window enter values [RED: 122 Green: 101 Blue:200] as sown in the figure below.
After filling up the values click "OK" .
Step 5: Now time to add one important ingredient for dreamy effect the BLURRRR. haha
To do this go to Filters>> Blur>> Gaussian Blur and open it. In the settings window that will open after the last action fill up values [Horizontal:15 Vertical: 15 ] according to figure below.
Step 6: Now Select the Background Layer and set it's transparency to 60%.
Step 7: Now select the "mono" layer again and go to Colors>>Colorize and open it. Now next step is kind of depend on your interest in color or requirement at the moment. In the colorize settings window you need to set only Hue Slider, leave other sliders as they are. Slide the Hue slider which will provide you a range of different colors as you slide it. Select your preferred value and press ok.
i've chosen the value as shown in the figure above and the result is as shown in the figure below:
And that's it our dreamy effect is complete, now just save the image. As you'll experiment with the Colorize settings you'll get pretty awesome results. Some of the examples as shown in the figure below:
I hope you'll like it. And it you do than please leave comments and share this tutorial.... Thanks and Enjoy.. [*_*]


YEAH SURE....
Good tutorial...thanks! Will put this technique to use.
Thanks!
Thank you!^^
Fantastic! Thank You.